Articles & Resources

Preparing Your Athletes For Rotational Exercises Part II - Advanced Rotary Movements

Posted by Boston Sports Medicine and Performance Group on Nov 21, 2010 3:00:00 PM

by Art Horne

In the previous article entitled, Are You Qualified? Preparing Your Athletes For Rotational Exercises, I discussed the need to qualify your athletes for rotary movement prior to employing a long and extensive list of rotational core exercises including medicine ball throws and high level chopping patterns.

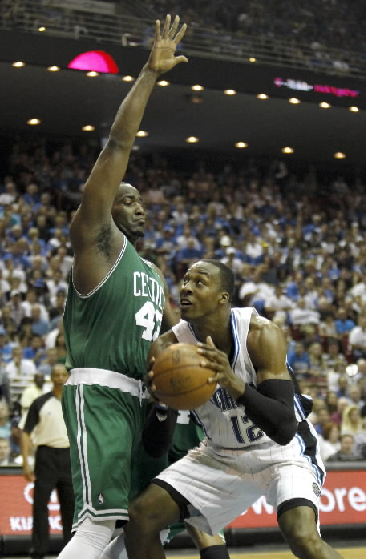
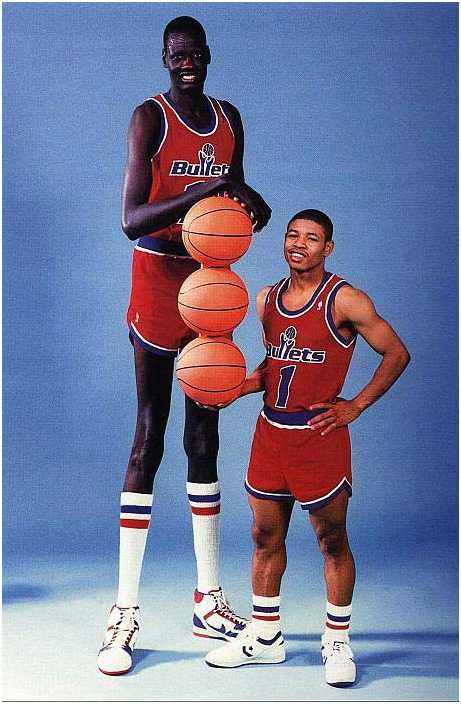
Below are a few advanced movements we employ after our athletes have demonstrated mastery in the rotary movements outlined previously. It should be noted that some athletes, especially the taller athletes, might not ever get to some of these movements and strength coaches and athletic trainers must resist the urge to progress these athletes along with the rest of the group until they have clearly shown mastery at the previous level.  Remember, although the tall guys enjoy a clear advantage around the rim, performing simple plank holds and/or other strength movements just takes a little bit more effort – including even some of the most elementary rotary movements.
basketball resources

 
A Note on the Latissiumus Dorsi as a Lumbar Stabilizer
In a previous interview with Low Back Expert, Dr. Stu McGill, he mentions the importance of engaging the lats during exercises to help stiffen the core and provide a stable and strong base to work from.  This point should be emphasized and facilitated when teaching the following exercises and also reinforced with those athletes having trouble “locking” their rib cage to their pelvis.  To do so, simply stroke the lats from the shoulder down and into the thoracolumbar fascia to help facilitate this massive lumbar stabilizer. (Note: this is a great technique also when teaching athletes to pull from the floor/blocks and during squatting to help prevent shearing forces at the lumbar spine)


Stir The Pot with 12 o’clock Reach

"Stir the Pot" has become a staple in our program, but eventually our stronger guards master this movement and some additional challenge needs to be given to them to keep them both interested and adapting to increased stress.  Once your athlete has mastered the basic exercise, which means a stable lumbar spine with no movement from rib cage to pelvis the following challenges can be made.

1. Reduce the width of their base of support by bringing their feet closer together.
2. Add an additional reach forward at the 12 o’clock position. Yes, this is actually an advanced “anti-extension” exercise, but a simple addition to a great exercise that gives you an additional bang for your buck.
3. Note: if your athlete is having trouble executing the beginner “stir the pot” instead of yelling at them over and over to hold their core tight, offer some simple tactile feedback by “raking” or “stroking” the lats on both sides to encourage this massive lumbar stabilizer to engage. This simple facilitation maneuver will give your athlete the needed cueing they lack to lock their spine in place.


Palloff Press with Lateral Walk

As I mentioned in the previous article this exercise progression should begin on the floor in a tall kneeling position and then eventually make its way up to standing.  Because we have limited Keiser machines in our facility we rarely incorporate this particular advanced movement into our team programming but proves to be an excellent exercise when working in smaller groups or one on one. 

Have the athlete press the resistance away from their sternum and hold this position. From there, incorporate a lateral walk without losing a stable torso.

- Remember: the lumbar spine was made to resist rotary motion, not to produce it.


Post – Pull and Press

This is a simple chop/lift variation that we include with our post players that challenges them to transfer outside forces through a stable spine.  Because the position and action “smells like basketball” compliance and effort is always high with this exercise.


- Position your athlete on a 45 degree angle with their back towards the Keiser machine.  In a deep post or athletic position first pull the cable stick across your body while maintaining a stable base and spine. This position should smell a lot like a deep post position in which your athlete must sit and take up space while asking for the ball with hands in front.


basketball resources


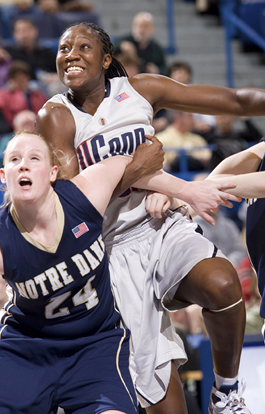
who ever said basketball isn’t a contact sport never played in the post


- Finish by pressing cable stick forward. Return and repeat.
- Emphasize transferring external load and resisting external rotational forces in a strong athletic position.


Front to Side Bridge

Although plank positions in and of themselves are not rotary movements, transitioning from one to the other certainly employs a great amount of rotary resistance.  We start this exercise progression as I would image most coaches would, with simple plank holds.  We then transition this simple exercise into a 5x5 second front-side planks.  The athlete will hold the side plank position for 5 seconds and then transfer to the front plank – easy right? Actually, it’s not.  The key here is to not allow the athlete to disassociate their hips/pelvis from their spine. Transitioning from the side to front plank is certainly the easier of the two but requires a ton of oblique involvement to keep the top shoulder and top hip moving in unison.  From there, a static 5 second hold is performed from which the athlete transitions back.  The final progression, as shown in the video, is a continuous front-side plank position without holds at either position. This is extremely challenging.  Rarely will your tallest athletes be able to complete this task on the floor.  Start these athletes by leaning to the wall to both learn and master this movement. 
** Remember - help your athletes achieve success by facilitating their lats with a few simple strokes and/or offering a small bit of assistance at either the shoulder or hips until they learn how to lock their rib cage and pelvis together.


Modification for the taller athlete


Medicine Ball Rotational Throws

Besides the traditional medicine ball throws that you have seen and used in your own programming, two that can be used to emphasize locking the rib cage to the pelvis as well as establishing a solid base and post position are the Split Stance Side Toss (used mostly with the guards) and the Over Head Pivot throw (used mostly with the post players).

a)Split Stance Side Toss
- Hold the medicine ball on outside hip in a split stance position
- pivot on inside foot while quickly rotating outside hip (locked into the rib cage) and medicine ball around to face the wall
- toss the medicine ball at the wall as hips becomes parallel with wall. Emphasize “locking” the rib cage and pelvis together during the throw and establishing a strong finish position while catching the ball returning from the wall.


b)OH Pivot Series
- Hold medicine ball above head while standing perpendicular to wall.
- Pivot on inside foot while “locking” rib cage and pelvis together so that shoulders and hip move in unison.


** in both of the above medicine ball activities an athlete with poor technique will lead with the hips or shoulders and not “couple” them together. Both end positions should be strong and seated emphasizing a strong athletic post position.
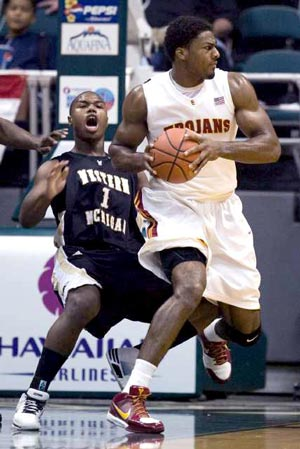
** although almost all healthy athletes will be able to complete these exercises with terrible technique and without pain, an emphasis must be made as with all medicine ball activities to produce power through the hips and resist motion in the lumbar spine. By allowing the rib cage and pelvis to become grossly separated repeatedly will increase the chance of aberrant motion throughout the lumbar spine and thus subsequent pain and injury to follow.  Post players that are not able to resist an external force (ie – Shaq, but then again who can right?) separating their upper and lower body during a fight for a deep post position or rebounding position will often find themselves at a huge disadvantage.
 

basketball resources


To quote Dr. Stu McGill, “Athletes utilizing explosive rotational exercises in search of world class performance will always end up chewing up their backs prior to reaching the point of world class performance in which they were in search of.”  


Keiser with MB dynamic lift pattern

As shown in the previous article, the lift pattern can become a dynamic exercise and one that clearly replicates an athlete working his way to the rim from the low block.  Since many schools do not have the use of a Keiser unit or enough units to make this exercise practical in a large group setting, we have incorporated the Verti-max units and have shown this exercise here using the Verti-max while holding a Core-ball for additional external resistance.  The goal of the exercise again is to resist rotary forces about the lumbar spine while producing this motion through the hips and “locking” the rib cage and pelvis together.


Closing Thoughts:

As with all exercises, mastery takes time.  Resist the urge to progress an athlete to the next level of difficulty prior to mastering the basics. This may even mean taking the taller athletes off the floor and starting them on a table or wall.  If you are unsure whether your athlete is prepared for a rotary activity simply have them perform the prone shoulder touch again or continue to incorporate this activity into your daily warm-up to help groove this pattern.

Topics: Art Horne, Health & Wellness

More Glutes Please: Part II by Art Horne

Posted by Boston Sports Medicine and Performance Group on Oct 30, 2010 11:32:00 PM

by Art Horne


basketball resources

It’s clear that good glute function and strength underpins good knee health – especially in the basketball athlete. However, despite the loads of research from the likes of Powers and Ireland supporting this concept, many athletes still continue to suffer despite our best efforts to strengthen the hip musculature and specifically the Gluteus Medius (GM).

Let’s take a closer look at what may be missing from your current GM training.

The Janda Approach

Janda identified two groups of muscles based on function within both the upper and lower body and classified them as either “tonic” or “phasic”.  The tonic group of muscles consists of the “flexors”, while the “phasic” muscle group consists of the “extensors” and work eccentrically against gravity.  Because of their position and function, Janda noted that the tonic muscles are prone to tightness and shortness while the phasic muscles are prone to weakness and inhibition.

With regards to knee pain, this concept is well regarded and accepted when dealing specifically with the iliopsoas and gluteus maximus among basketball strength coaches and athletic trainers.  Not only is the iliopsoas short and tight in most basketball athletes, and the gluteus maximus inhibited, but it is also well accepted that this iliopsoas “tightness” causes a reflexive reciprocal inhibition and thus may be a contributing cause to the phasic nature of the gluteus maximus. In fact, one could spend an extraordinary amount of time “facilitating” the gluteus maximus with retraining or activation exercises, but until the iliopsoas’ tonic nature is reduced these exercises may very well be futile.  This is similar to the light switch in your home office.   You can flick your office light switch on and off all you want (activation), but unless there is electricity getting to that switch (reduced tone in the iliopsoas) those lights just aren’t coming on.

Flexor Withdrawal Reflex

Definition:  a common reflex consisting of a widespread contraction of the physiologic flexor muscles and relaxation of physiologic extensor muscles; characterized by an abrupt withdrawal of the body part in a response to a painful stimuli.

I first learned about this reflex in school where I memorized it for the exam and soon forgot about it until this “phenomenon” was discussed again upon visiting Nico Berg (speaker at the 1st Annual Boston Hockey Summit) in Vancouver BC Canada during a summer learning trip.  During my visit he so kindly pointed out to me that after injury, not just after touching a hot stove as we were all taught, that the body undergoes this flexion “contracture”.  Take for example the common ankle sprain – extension of the ankle (dorsiflexion) is never the position that an athlete will choose to splint themselves in after injury.   Plantar flexion is the preferred motion and thus a loss of Achilles length is the normal consequence of crutch walking after ankle sprain. Yes, gravity has a lot to do with the foot flopping down into this prolonged plantar flexed position, and of course the sheets on your bed further aggravates this problem as you lay helpless against the power of your cotton comforter and gravity, but neither of these can be associated with the flexion “contracture” found in both the knee and elbow after injury.  When was the last time you heard an athlete having trouble getting their flexion back after knee surgery?

Let’s take a look how this flexion pattern may relate to knee pain, adductor tightness and ultimately glute med dysfunction. 

basketball resources


In this case some would argue that the chicken came before the egg when it comes to PFPS (patellofemoral pain syndrome – or good ol’ fashion knee pain) and associated glute med weakness. For this argument, let’s just say that the knee pain, and hence the painful stimuli, happened first.  As we mentioned before the body will undergo a “flexion” contracture or flexion type pattern.  Normally, when discussing flexion at the knee the most common sagittal plane flexion-extension movement comes to mind, but for the sake of this argument let’s instead focus on the frontal plane “flexion” pattern.

“But Art, that’s called adduction!”

Call it what you want – but we would all agree that the knee and the surrounding musculature moves and shortens towards the body’s midline – (hip adduction, femur internal rotation and flexion – some actually call this combined motion pronation, but that’s for another day) -  think fetal position. 

basketball resources 


Needless to say, the adductor group similar to your gastroc-soleus complex after an ankle sprain, hamstrings after a knee injury and biceps after elbow insult, become short - agreed?


basketball resources

Enter Sherrington’s law of reciprocal inhibition (Sherrington, 1907), which states that a hypertonic antagonist muscle may be reflexively inhibiting its agonist! Therefore, in the case of our glute med strengthening exercises, the presence of these tight and/or shortened adductors (antagonistic muscles), restoring normal muscle tone and/or muscle length must be addressed first before attempting to strengthen the weakened or inhibited gluteus medius (agonist muscles). (Page)
“Wait a second, I’ve heard this before.”
Yes, you probably have.  In fact, Janda so famously described this trend as the Lower Crossed Syndrome.  Unfortunately,  so much attention has been given to the interplay between psoas tightness and gluteus max dysfunction that I think we’ve forgotten about max’s little brother medius.
Same challenges, same solutions. 
Tightness and on one side of the joint with inhibition on the other.

Putting It All Together
My challenge is simply to take this concept (that you are already employing with the hip flexor and gluteus max) one step further and apply to the tonic Hip ADDuctors and the Gluteus Medius – two muscles that sit on opposite sides of the joint similar to the iliopsoas and gluteus maximus.

Taking the tone out of the Adductor Group

Prior to beginning any gluteus medius strengthening work, encourage your athletes to address the soft tissue restrictions within the adductor group with one or both of the below foam roller techniques and follow up with a kneeling hip adductor stretch. 

Remember, frantically flicking the light switch on and off won’t get electricity to the light bulb unless power is running into your house first.

Encourage your athletes to address the entire adductor group from origin to insertion. For shorter athletes this is easy by having them "unload" their weight as needed and addressing on a treatment table. Taller athletes often need a taller table or some additional coaching.


For those athletes that need additional help, some light over-pressure from a coach or athletic trainer while taking their femur through their available internal and external range of motion is often helpful. Warning: Athletes with existing knee pain tend to be very tender over the adductor group as it crosses the knee - especially the first time.  As this "tone" and discomfort becomes less, so does the athlete's anterior knee pain.  In fact, it is my experience that you can predict which athletes have anterior knee pain and which leg their knee pain exists by the amount of tenderness athletes describe during this maneuver.


Follow up your foam rolling with some adductor stretches in an effort to sustain this new tissue quality and length.

References


Beckman SM, Buchanan TS. “Ankle inversion injury and hypermobility: Effect on hip and ankle muscle electromyography onset latency.” Arch Phys Med Rehabil. 1995; 76(12):1138-1143.

Biel A. Trail Guide to the Body. 3rd Ed. Boulder, CO: Books of Discovery; 2005.

Distefano LJ, et al. “Gluteal Muscle Activation During Common Therapeutic Exercises.” Journal of Orthopaedic & Sports Physical Therapy. 2009. Vol. 39. No. 7. 532-540.

Drake RL, Vogl W, Mitchell AWM. Gray’s Anatomy for Students. 1st Ed. Philadelphia, PA: Elsevier Churchill Livingstone; 2005.
Fredericson M, Cookingham CL, Chaudharis AM, Dowdell BC, Oestreicher N, Sahrmann SA. “Hip abductor weakness in distance runners with iliotibial band syndrome.” Clin J Sports Med. 2000; 10:169-175.

Friel K, McLean N, Myers C, Caceres. “Ipsilateral hip abductor weakness after inversion ankle sprain.” J Athl Train. 2006; 41(1):74-78.

Henriksen M, Aaboe J, Simonsen EB, Alkjaer T, Bliddal H. “Experimentally reduced hip abductor function during walking: Implications for knee joint loads.” J Biomech. Accepted March 11, 2009, not yet in print.

Ireland ML, Wilson JD, Ballantyne BT, Davis IM. “Hip Strength in females with and without patellofemoral pain.” J Orthop Sports Phys Ther. 2003. 33(11):671-6.

Janda V. 1987. “Muscles and motor control in low back pain: Assessment and management.” In  Twomey LT(Ed.) Physical therapy of the low back. Churchill Livingstone: New York. Pg. 253-278.

Khaund R, Flynn SH. “Illiotibial Band Syndrome: A Common Source of Knee Pain.” Am Fam Physician. 2005; 71(8):1545-1550.

Nadler SF, Malanga GA, Feinberg JH, Prybicien M, Stitik TP, DePrince M. “Relationship between hip muscle imbalance and occurrence of low back pain in collegiate athletes: a prospective study.” Am J Phys Med Rehabil. 2001; 80(8):572-577.

Nakagawa TH, Muniz TB, Marche Baldon RM, Maciel CD, Menezes Reiff RD, Serrao FV. “The effect of additional strengthening of hip abductor and lateral rotator muscles in patellofemoral pain syndrome: a randomized controlled pilot study.” Clin Rehabil. 2008; 22: 1051-1060.

Nelson-Wong E, Gregory DE, Winter DA, Callaghan JP. “Gluteus medius muscle activation patterns as a predictor of low back pain during standing.” Clin Biomech. 2008; 23:545-553.

Page, P. Frank C. The Janda Approach to Chronic Musculoskeletal Pain.

Presswood L, Cronin J, Keogh JWL, Whatman C. “Gluteus Medius: Applied Anatomy, Dysfunction, Assessment, and Progressive Strengthening.” Strength and Conditioning Journal. 2008; 30(5): 41-53.

Sahrmann. Diagnosis and Treatment of Movement Impairment Syndromes.


Sherrington CS. 1907. “On reciprocal innervations of antagonistic muscles.” Proc R Soc Lond [Biol] 79B:337.

Shimokochi Y, Shultz SJ. “Mechanisms of noncontact anterior cruciate ligament injury.” J Athl Train. 2008; 43(4):396-408.

Souza RB, Draper CE, Fredericson M. Powers CM. “Femur Rotation and Patellofemoral Joint Kinematics: A Weight-Bearing Magnetic Resonance Imaging Analysis.” Journal of Orthopedic & Sports Physical Therapy. 2010. Vol 40:5. 277-285.

Starky C, Ryan J. Evaluation of Orthopedic and Athletic Injuries. 2nd Ed. Philadelphia, PA: F. A. Davis Company; 2002.

Umphred DA, Byl N, Lazaro RT, Roller M. 2001. “Interventions for neurological disabilities.” In Neurological Rehabilitation (Umphred DA, ed) 4th ed. Mosby: St. Louis. 56-134.

Wilson E. “Core Stability: Assessment and Functional Anatomy of the Hip Abductors.” Strength Cond J. 2005; 27(2):21-23.

Topics: Art Horne, Health & Wellness

An Interview With Legendary Coach, Tom Murphy by Art Horne

Posted by Boston Sports Medicine and Performance Group on Oct 24, 2010 11:58:00 AM

basketball resources

by Art Horne

Coach Murphy, you won over 600 basketball games (602-263) while you were at Hamilton College.  Besides the natural ability to put the ball in the basket, what physical qualities did you look for while recruiting players at Hamilton and now at Northeastern University?

• Quickness: can they change direction quickly? Closeout on a shooter? Are they able to pressure the ball during a full-court press and then get to their next assignment?
• Hand-eye coordination: are they able to handle bad passes? Can they catch and handle the good passes as well as make good passes to their teammates?
• Foot speed: and how well they move their feet.  Can they open their hips and swing their feet around to establish position? Can they recover and defend after being crossed-over?
• Conditioning: this could always be improved upon once they arrived on campus so I never held it as a must when evaluating kids.  But if they weren’t in shape in the first place seldom were they able to show you that they could move their feet or coordinate passing and catching due to fatigue.
Legendary Princeton basketball coach Pete Carril once said that the ability to rebound was inversely proportioned to the number of cars that his players had in their garage. Beside pure physical attributes, what do you look for in a basketball recruit?
ATTITUDE:  95% or maybe even a greater percentage of coaches recruit pure ability, but I look at attitude.  Players need to be a good teammate; they have to have the right attitude.  No matter how much ability they may have, if they have a bad attitude they will never be as successful as they could have been with the right attitude.


How has college basketball changed from when you coached to today? How has the players changed?

The addition of the 3-point line has changed the game the most.  I think it was the year that Pitino went to the final four with Providence.  He figured it out before a lot of other coaches – 3 points are better than 2. That year I think his team shot the most number of 3-pointers in Division One and we shot the most 3-points in Division Two at Hamilton.  The 3-point line changed spacing on offensive and really stretched defenses.

A lot has been made of how a few professional athletes have handled their business off the court.  How has these professionals influenced the players that you deal with today?

I just hope that the basketball players today have learned from both the positive and negative actions of the guys that have done it before.  A lot of people focus on the guys that have made mistakes, Antoine Walker comes to mind (recently in jail) and we can use those examples to demonstrate to our players what not to do, but there are many positive examples that we can use as well such as Jerry West and Ray Allen, guys that are professional and respectful in every facet of their lives.

What does LeBron’s recent ESPN show, “The Decision,” say about the culture of basketball and where do you think it is heading?

LeBron is still young and young people make mistakes.  Announcing your decision to join a new employer/team on national television is not the way to go about business. Especially without speaking to your current employer about your decision first.  The game will survive LeBron, but LeBron’s shine has clearly faded after his “decsision.”

While at Hamilton you were famous for your conditioning drills. Can you share your favorites?

• We would run 11 down and back in a minute at the end of a practice.  If you could run 11 lengths in under a minute you were pretty fit. 
• We would also run baseline to baseline for as many repetitions as possible over 3 minutes.  The Boston Celtics use this run and we still use it at Northeastern.  It’s as much a conditioning test as it is a test of mental fortitude.
• Lane Slides: I would have our athletes hold bricks with their hands out to the side and do as many lane slides as possible for 30 seconds. Bigs would have to get one foot outside the lane and guards both feet out.

Topics: Basketball Related, Art Horne

More Glutes Please - Part One by Art Horne

Posted by Boston Sports Medicine and Performance Group on Oct 23, 2010 10:53:00 AM


Are you hammering your athlete's glutes or just hammering your head against the wall?

Many athletic trainers and strength coaches will prescribe glute med work in their programs whether it be for rehabilitation, activation exercises before training or simply as part of an athlete's maintenance work - yet many of the problems for which we prescribe this work continues to show its ugly head during the basketball season. 

Lets take a closer look at the work we are doing for the gluteus medius and what we might be missing in our athlete's program. 

everything basketball


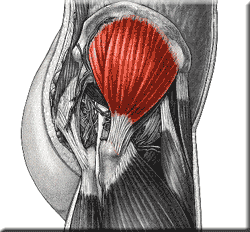
Origin: External surface of ilium between anterior and posterior gluteal lines.

Insertion: Lateral surface of the greater trochanter.

Innervation: Superior Gluteal Nerve (L4, L5, S1)

Function

All fibers abducts femur at the hip joint. Anterior fibers flex and medially rotate the hip. Posterior fibers extend and laterally rotate the hip. Most importantly, it holds the pelvis secure over the stance leg and prevents pelvic drop on the opposite swing side during walking.

Assessment

Palpation
With your patient/athlete side-lying, isolate the shape of the gluteus medius by placing the webbing of one hand along the iliac crest (from PSIS to nearly the ASIS) while the hand locates the greater trochanter. Your hands will form the pie-shaped outline of the gluteus medius.  Palpate in this area from just below the iliac crest to the greater trochanter for the dense fibers of the gluteus medius. Ask your patient/athlete to abduct his/her hip slightly and you should feel the gluteus medius contract. (See attached diagrams.)

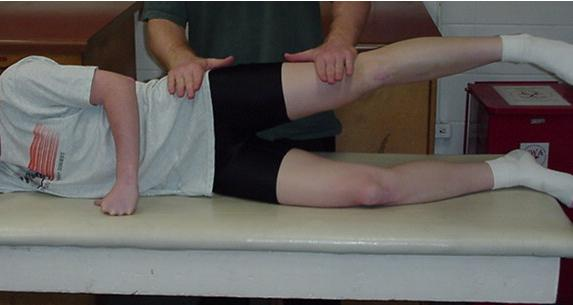
Hip Abduction Strength Test
• The patient is side lying with test leg on top.
• The therapist stands behind the patient and stabilizes with one hand at the hip, proximal to the greater trochanter.
• The other hand applies resistance across the lateral surface of the knee.
• Patient abducts hip against downward resistance
• If the patient is unable to perform the test side lying, place them in a supine position and feel for a gluteus medius contraction as they attempt to abduct their legs along the table.
• Note: During side lying hip abduction testing, Wilson (2005) points out that athletes “with weak hip abductors will attempt to compensate by recruiting their tensor fascia lata (flexing their hip), their external rotators (lateral pelvic rotation), or their quadratus lumborum (“hiking” their hip).”


everything basketball


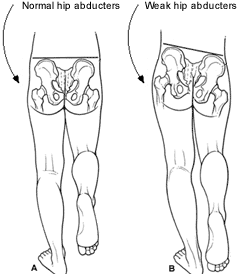
Trendelenburg’s Test for Gluteus Medius Weakness (Starkey, p293)

• Patient Position: Standing with weight evenly distributed between both feet.
• Lower patient’s shorts to the point that the iliac crests or PSIS is visible.
• Examiner Position: Standing, sitting, or kneeling behind patient.
• Procedure: The patient lifts the unaffected leg, standing on the affected leg.
• Positive Test: Pelvis lowers on the non-weight-bearing side.
• Implications: Insufficiency of the gluteus medius to support the torso in an erect position, indicating weakness in the muscle of decreased innervation.

everything basketball


Implications of Gluteus Medius (GM) dysfunction

Why we do what we do

Presswood et al (2008) state that “a weak or dysfunctional GM is linked to numerous injuries of the lower extremities and abnormalities in the gait cycle.” (p 41) The authors cite past research that implicates a weak/dysfunctional gluteus medius in Trendelenburg gait (see above), lower back pain, Iliotibial band syndrome, patellofemoral pain syndrome, ACL tears and other knee injuries, and ankle injuries. (p 42-43)

Trendelenburg Gait

During walking if a person’s GM, on either side, is weak the hip of the leg currently in the swing phase of walking will drop tilting the pelvis laterally. (See Trendelenburg Test above for more information) Presswood et al state that this will reduce gait efficiency and may lead to decreased running speed, and possibly lower back pain since that pelvis is not stabilized properly during activity. (p 42)

(Weak and inefficient Glute Med. on the basketball court = ENERGY LEAK during Cross Over Dribble.  Want to move in the front plane more efficiently?  Train the Frontal Plane.)

everything basketball


Lower Back Pain

Research published by Nelson-Wong et al (2007) showed that, “Muscle activation patterns at the hip may be a useful addition for screening individuals to identify those at risk for developing low back pain during standing.” (p 545) Twenty three subjects, 12 men and 11 women, were made to stand in a constrained position for 2 hours while their hip muscle activity was monitored. 65% of those studied developed low back pain during the test, and 76% of those subjects had reduced GM activation.  Additionally, Nadler et al (2001) showed that hip muscle imbalance, specifically with GM weakness, was strongly associated with low back pain in female athletes.

Iliotibial (IT) Band Syndrome

Khaund and Flynn (2005) state that IT band syndrome “is caused by excessive friction of the distal iliotibial band as it slides over the lateral femoral epicondyle during repetitive flexion and extension of the knee resulting in friction and potential irritation.” (p 1545) Key clinical recommendations in this article are that hip abductor weakness can contribute to IT band syndrome, and that strength training emphasis needs to be placed on the gluteus medius. (p 1546) The authors go on to cite research by Fredericson et al (2000) that concluded that, “Long distance runners with ITBS have weaker hip abduction strength in the affected leg compared with their unaffected leg and unaffected long-distance runners. Additionally, symptom improvement with a successful return to the preinjury training program parallels improvement in hip abductor strength.” (p 169)

Patellofemoral Pain Syndrome (PFPS)

Presswood et al (2008) cite research that defines PFPS as “an overuse injury characterized by anterior knee pain, often aggravated with stairclimbing, squatting, or sitting for prolonged periods of time.” (p 42) The authors go on to state that “inhibition or dysfunction of the GM may contribute to decreased hip control, allowing greater femoral adduction and/or internal rotation. This produces a larger valgus vector at the knee, increasing the laterally directed forces acting on the patella and contributing to the patella tracking laterally.” (p 42)

Nakagawa et al (2008) set out to study the effect of strengthening PSPS diagnosed patients’ quadriceps along with the hip abductors and lateral rotators (intervention) vs. just strengthening the quadriceps (control). Only the patients who were in the group strengthening the hip abductors and rotators improved their perceived pain symptoms. The intervention group not only had a reduction in pain, they also had increased knee extension torque and GM EMG activity. The control group’s only change was an increase in knee torque.

ACL Injuries

everything basketball

Presswood et al (2008) states that excessive “knee valgus or rotation of the femur during landing is a potential mechanism for ACL injury.” (p 43) The authors go on to say that athletes with a high level of GM control and strength are better prepared to counter these movements. In addition, female athletes have a 6-8 times greater chance of ACL injury, possibly due to increased “knee valgus and/or hip rotation [relative to] male athletes.” (p 43)

Shimokochi et al (2008) searched for literature regarding noncontact ACL injuries between 1950 and 2007, to ascertain possible mechanisms of injury. After finding and analyzing 40 articles meeting their criteria, the authors’ main conclusion was that ACL “injuries often happen when an individual attempts to decelerate the body from a jump or forward running while the knee is in shallow flexion angle. At the time of injury, combined motions such as knee valgus and knee internal-external rotation are often noted.” (p 406) They also noted that the ACL is “loaded with anterior tibial shear forces. Unopposed quadriceps muscle forces produce anterior shear forces, possibly damaging the ACL, especially near full extension.” (p 406) These conclusions support the need for not only proper GM function to avoid ACL injuries, but also the need for proper hamstring strength and function to counteract overt quadriceps dominance, along with excessive knee valgus and rotation.

Ankle Injuries

Friel et al (2006) tested a group of 23 people, ages 18 to 52 years old, with a history of at least 2 ankle sprains to the same side with no injury to the other side, and no traumatic lower extremity injury with 3 months. The study found that the strength of the hip abductors on the previously injured side was significantly reduced compared to the uninvolved side. Based on past research the authors stated that “After lower limb ligamentous injuries, dynamic postural control of the lumbopelvic hip complex decreases.” (p 76) Coupled with past data and results of the current study, the authors concluded that if a person’s hip abductors are weak they will be unable to counteract normal lateral sway during gait, which can potentially lead to ankle injury.

Additionally, Beckman et al (1995) studied the reflex latency response of hip and ankle muscles during ankle inversion. The authors concluded that subjects with ankle hyper mobility had decreased latency (the gluteus medius fired prematurely) of hip activation after ankle inversion. The researchers hypothesized that this was a protective measure coordinated by the body’s motor neurons that compensate for the hyper mobile ankle, and they concluded that clinicians must address altered hip muscle recruitment patterns in patients with ankle sprains.

Suggestions for Improving Function and Strengthening the Gluteus Medius

Presswood et al, in the authors’ review of past gluteus medius literature, state that generally patients are “prescribed open-chain or single-leg stance exercises to initially strengthen the GM in a side-lying or weight-bearing position. Closed chain exercises are introduced during the later stages of rehabilitation, once basic strength has been developed.” (p 44-45)

In reference to sets, reps, and frequency, the authors go on to cite a position statement by the American Council of Sports Medicine states that “at least 2 training sessions a week that involve 2 to3 sets of between 6 to 15 repetitions per set will lead to considerable increases in muscular strength and endurance.” (p 50) However, every patient is different, so the authors go on to reference the book, Techniques in Musculoskeletal Rehabilitation (McGraw-Hill Profession, 2001), and state that “for rehabilitation, strengthening exercises should be performed on a daily basis initially, with the number of repetitions and sets controlled by the patients’ level of pain, swelling, and response to exercise. As healing progresses, the muscle can be exercised every second day so the frequency becomes 3 to 4 times per week. Thus the exact loading parameters would appear to be dependent on the person’s injury and may vary between individuals.” (p 50)

With this in mind, the main goal of a GM strengthening program is to progressively overload the muscle so that it continues to develop muscular strength, control, and endurance. Review the article “Gluteus Medius: Applied Anatomy, Dysfunction, Assessment, and Progressive Strengthening” by Presswood et al as a starting place for more details.

Click here to view Common Gluteus Medius Strength Exercises.

Click below to view Uncommon Gluteus Medius Strength Exercises that you wish you were doing.


Summary

So what does this all mean and how does this apply to Basketball perforamance and health?

1. A strong and efficient GM is important in maintaining a healthy basketball athlete - Low back pain, knee pain and ankle problems (smells a lot like what keeps basketball athletes from playing the most doesn't it?) are all affected by GM dysfunction and weakness. Filling this gap in their training and maintenance program is the first step in keeping them on the floor.

2. Basketball = Knee Pain (or at least it used to).  At one time basketball athletes were condemned to live out their careers with chronic knee pain because, "thats just part of the sport."  With the work of Powers, Ireland and others, knee pain can be addressed by first attacking the hip (Charlie Weingroff presented on the importance of the Vertical Tibia and Knee Pain at this past year's Basketball Specific Conference ) and specifically addressing the GM. So turn off your ultrasound machines and get back to some good old fashion hip strengthening exercises.

3. Performance: a strong GM along with a trained and efficient Quadratus Lumborum/Obliques (lateral line) makes change of direction specifically in the frontal plane much more explosive and with less energy leakage enabling your athletes to move left to right at the speed of light. 


Next week: Why all your glute med work still isn't working - The missing piece

Topics: Art Horne, Health & Wellness

A Question Of Conditioning: A Look Back At How It All Started - One Year Ago

Posted by Boston Sports Medicine and Performance Group on Oct 9, 2010 7:02:00 PM

by Art Horne


About one year ago, a question on conditioning came up among a small community of strength coaches and friends. From this the idea of EVERYTHING BASKETBALL was born.  Today, EVERYTHING BASKETBALL continues to highlight the very best basketball professionals from across North America from all professional backgrounds and affiliations.

Thanks for continuing to share your ideas, videos and training advice.


The first question

______________________________________________________

Coaches,

I'm starting to put together my pre-season conditioning program for hoops and wanted to know if any of you have ever done the sideline ladder drill and if so, twice?
For example - one time up and down the ladder is this:
2,4,8,12,16,12,8,4,2

I want to put a progression together where we go up and down the ladder twice.  Didn't know if this is too much or even reasonable.
Please let me know what you all think (even if I'm crazy to think this) and what your experience is with this.
If you could reply to all that would be great - that way we could all learn from this.

Thanks and I hope everybody is having a great summer,
B
--
Brijesh Patel
Head Strength and Conditioning Coach
Quinnipiac University

_______________________________________________________

B,

I will try to be brief and elaborate later if you would like. I am out of town and typing on a blackberry. I have used ladders in the past and they have predominantly been of the full-court variety for many of the reasons Shawn pointed out with change of direction. 

The last couple of years I've been utilizing the heart rate monitors during our energy system development like Ray and have been doing a tempo/ladder type drills during the pre-season. I have always been more concerned about the total volume and how to manipulate it in conjunction with pick-up games.

I attempt to mimic the variety of distances and duration of efforts we incur in competition while still managing volume I have done sets of 3-5 repetitions for 4-6 total sets of varying distances. We know the court is roughly 30 meters. We can do runs of 30m(1), 60m(2), 105m(3.5), 150m(5), and 210m(7) at different gears (% of effort)in a set in any sequence or combination with varying amounts of active rest (1:1, 1:2, etc)between reps. Between sets is active recovery usually 120sec, about the amount of time for a TV timeout or foul called and free throws. I have found that the HR data and reports after show we have taxed both systems and the graphs look like those of game play. Doing it this way I can track the accumulated volume and adjust based on much playing and individuals they are doing and the HR data can give me signs of overreaching if we are doing too much.  

I can go over the progression and other components of some the ESD with you next week if you want to call.


Mike

Mike Curtis, M.Ed., CSCS, USAW, SCCC, NASM-PES, CES Head Strength & Conditioning Coach, Men's Basketball University of Virginia Athletics
__________________________________________________________________________

Brijesh – Ray Eady (Wisconsin) and I were talking last night and he thought that maybe the women needed more change of direction so that they learn how to move more appropriately and transfer force,  etc better... more turns means more reps/opportunities for learning? Or more opportunity to get hurt?

What do you think?

Art Horne
Northeastern University

_______________________________________________________


Art

That's a great point and I was thinking of that too - I like them performing more change of directions to make them more "athletic" but also worry about all the eccentric contractions.

I think I'm going to stick with the sideline but go with Ray and take out the "12" so we'll go:
2, 4, 8, 16
And work up to doing 3-4 sets of that....I may not go down the ladder but just go up like Ray does.

What do you do for pre-season condo?

Brijesh Patel

_______________________________________________________

Brijesh:

Ill have to send you the stuff, but basically we do five days.

- We perform your metabolic conditioning sequence to end each week prior to the beginning of practice so I think we are on week 6 now?
- slide board/bike combos (because we don't have enough of either so we split then switch) slide board 30:30, bike 20:40 on:off
- speed/metabolic with tire runs, sleds and prowlers
- lastly a plate circuit that has a tremendous effect which starts at 20:40, 30:30, and ends with 40:20
- On Sundays we do a pool day which is mostly movement based and acts as a recovery but we finish with some conditioning then too.

Art

_______________________________________________________

As they say the rest is history……..

Best of luck this basketball season.


Topics: Art Horne, Conditioning-Agility-Speed

Are you Qualified? Preparing Your Athletes For Rotational Exercises

Posted by Boston Sports Medicine and Performance Group on Oct 7, 2010 7:37:00 PM

by Art Horne

In the vast majority of well planned programs in both Strength and Conditioning and Sports Medicine, athletes and patients must “qualify” for a particular exercise prior to being introduced to it as a formal part of their training or rehabilitation program.  For example, it would be ill advised to simply ask an athlete to perform depth jumps without knowing they had a sufficient strength base first (1.25 x BW for females and 1.5 x BW for males seems to be standard).  Hang Cleans are rarely taught until an athlete or patient shows proficiency in a box jump, good front squat technique and a reasonable strength base.  Even in Sports Medicine, one must “qualify” to drop the crutches after injury in favor of full weigh-bearing so long as they are abel to demonstrate normal, pain-free gait.  Yet, when it comes to addressing “core” exercises many are often prescribed without thought or prior planning.  This is especially true when evaluating rotational exercises.

McGill has demonstrated time and again that people with troubled backs simply use their backs more during activities.

“But you need a strong back don’t you?”

Well yes, but there’s more to it than that.  In fact, the guys that have these troubled backs most often have much stronger backs but are less endurable than matched asymptomatic controls (McGill et al, 2003).  In addition, those that have back pain (and a stronger back mind you) tend to have more motion in their backs and less motion and load in their hips.  And we all know what poor hip mobility means don’t we – you got it, back pain.  (McGill SM et al. Previous history of LBP with work loss is related to lingering effects in biomechanical physiological, personal, psychosocial and motor control characteristics. Ergonomics 2003;46:731-46.)

"So what does all this hip, back and stability stuff have to do with rotational core and power training? I just want to throw some heavy medicine balls against the wall and wake up the neighbors!”

Not so fast, as I mentioned, mobile hips and a stable and strong mid-section are paramount and a MUST prior to any type of rotational medicine ball or rotational power training.  The Mobility-Stability/Joint by Joint Approach to Training made famous by Boyle and Cook is of course a must, yet very few actually test to see if their athletes have “stability” where stability should lie – the lumbar spine. This is especially important for post players who require a decisive and strong drop step to establish position in the post. Any leakage in energy or disconnect between their shoulders and lower body will surely afford them a less than desirable position on the low post.

everything basketball

Isn't being on a poster great?


Prone Touch - A Rotary Qualifier

The simple “Prone Shoulder Touch” or “Prone Touch” is a simple test to ensure your athletes are able to lock in their lumbar spine while undergoing and controlling a very basic rotational force.  In this test the athlete is resisting rotary forces by picking one hand off the ground, touching the opposite shoulder and replacing.  If your athlete cannot hold their pelvis and shoulders level to the ground they are simply not ready to “produce” rotary forces due to the fact that they just demonstrated that they could not even “resist” a simple rotary force.  You wouldn’t depth jump an athlete unless they could produce the required force first right? 

Remember, the core, more often than not functions as a preventer of motion and not as an initiator.  Good technique in both daily living tasks and sports demand that force be generated at the hips and transmitted through a stiffened core. (McGill, Ultimate Back Fitness and Performance)

Not sure if your athlete is holding their spine in place?  I often ask athletes to touch each shoulder 20 times total after lifting up their shirt and exposing their low back.  (Baggy basketball shirts and shorts won’t allow you to view and make an appropriate decision.) Being able to hold this position, and ultimately resist the 280 lb power forward trying to dislodge you from the block requires not only strength but strength that endures.  Twenty touches may seem like a lot, but dysfunction rarely presents itself at first, and requires a bit of fatigue before it jumps out at you. 

Note: many tall athletes will automatically find this exercise to be difficult. Starting them on their knees or bringing them up to a box serves as a nice starting position.


Athletes that struggle to hold the Prone Touch position should start with simplier exercises such as McGill's Bird-Dog and Stir the Pot prior to beginning more advanced exercises.


Anti-Rotation Press Progression

Key Points: maintain a capital "T" posture with shoulders level and spine perpendicular to the ground.  Don't let the resistance or cable rotate your torso.  Encourage athlete to breathe normally.


Chopping Patterns

Mastering the Chop prior to the Lift or other more advanced core lifts in important as it provides for a good understanding of body position, awareness and handling outside forces while maintaining a stable spine.

Key Points: place your hand on your athlete's head and ask them to push into your hand to ensure they have good posture and a tall spine.  Progression much like the Anti-rotational press starts in a tall kneeling position, to a half kneeling position, and finally to a standing positon.


Lift progression

Most athletes have trouble understanding body position and thus mastering the Chop prior to the Lift is key in developing appropriate rotary resistance strength. 

Key Point: Lift should be broken down into two distinct components during the teaching phase. 1. pull towards mid-line, and 2. press away (I like to remind our basketball athletes to finish strong as if they were powering up with the ball towards the hoop).  Maintain tall posture and capital "T" position throughout.

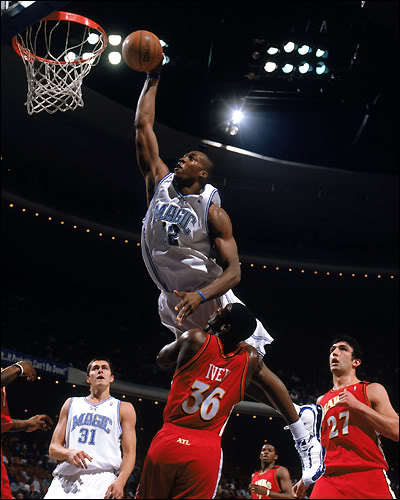
Looks a lot like Dwight's about to do a dynamic lift pattern doesn't?

everything basketball

Landmine

Besides a variety of medicine ball throws which incorporates producing force, the landmine is the last in the progression to resisting rotary forces. Posture, technique and breathing are key here as well.

Anti-rotation exercises don't have to be exclusionary of eachother and can be programmed either within the same training session or within the same week and do not necessarily have to follow the progression outlined above.  However, strict attention should be given to your athlete's ability to reduce motion/force, not produce it.  Lowering the outside resistance on either a Keiser or weight machine will allow your athletes to maintain proper position and ensure your athletes success while resisting rotary forces and preparing them to do the same on the court.  However, demonstrating clearly that your athletes are first able to begin this progression starts with qualifying your athlete's ability to do so with a simple Prone Touch.


References:


• Aultman,C.D., Scannell,J., and McGill, S.M. (2005) Predicting the direction of nucleus tracking in porcine spine motion segments subjected to repetitive flexion and simultaneous lateral bend. Clinical Biomechanics, 20:126-129.
• Kavcic, N., Grenier, S., and McGill, S. (2004b) Determining the stabilizing role of individual torso muscles during rehabilitation exercises. Spine, 29(11):1254-1265.
• Koumantakis GA, Watson, PJ, Oldham, JA, Trunk muscle stabilization training plus general exercise versus general exercise only: Randomized controlled trial with patients with recurrent low back pain. Physical Therapy, 85(3):209-225.
• Marshall LW and McGill SM. (2010) The role of axial torque in disc herniation. Clinical Biomechanics. 25 (1):6-9.
• McGill SM et al. Previous history of LBP with work loss is related to lingering effects in biomechanical physiological, personal, psychosocial and motor control characteristics. Ergonomics 2003;46:731-46.
• McGill, S.M. (2007) Low back disorders: Evidence based prevention and rehabilitation, Second Edition, Human Kinetics Publishers, Champaign, IL, U.S.A.
• McGill, S.M., (2007) (DVD) The Ultimate Back: Assessment and therapeutic exercise, www.backfitpro.com
• McGill, S.M. (2009) Ultimate back fitness and performance – Fourth Edition, Backfitpro Inc., Waterloo, Canada, (www.backfitpro.com).
• McGill, S.M., Karpowicz, A. (2009) Exercises for spine stabilization: Motion/Motor patterns, stability progressions and clinical technique. Archives of Physical Medicine and Rehabilitation, 90: 118-126.
•  McGill, S.M. (2010) Core Training: Evidence Translating to Better Performance and Injury Prevention. Strength and Conditioning Journal, Vol. 32;3. 33-46.
• McGill, S.M. Presentation at Third Annual Distinguished Lecture Series in Sports Medicine, 2009. Northeastern University.

Topics: Art Horne, Strength Training

Low Back Pain and The Basketball Athlete by Art Horne

Posted by Boston Sports Medicine and Performance Group on Oct 3, 2010 4:22:00 PM

Click HERE to download and view the entire powerpoint presentation.


Topics: Art Horne, Health & Wellness

Broken Bones, Broken Hearts And The Ottawa Ankle Rules by Art Horne

Posted by Boston Sports Medicine and Performance Group on Sep 27, 2010 6:11:00 PM

by Art Horne

A review of:
Jenkin M Sitler MR, Kelly JD. Clinical Usefulness of the Ottawa Ankle Rules for Detecting Fractures of the Ankle and Midfoot. J Ath Train. 2010;45(5):480-482.

Basketball season is back and with it comes a new season of early morning conditioning runs, late night pick-up games, and of course, a few ankle sprains along the way.  Like clockwork, gasps by teammates and spectators can be heard followed by the uncertain question after such injury, “is it broken?” 

First introduced in 1992 by Stiell et al, the Ottawa Ankle Rules were a guideline for caregivers after ankle trauma to determine whether or not an ankle/foot x-ray was warranted in the evaluation and care of the athlete.  Having been designed to have a high sensitivity for detecting significant fractures, its other goals include decreasing unwarranted radiation and avoiding long waits in the emergency rooms for x-ray evaluation.

Based on the Ottawa Ankle Rules, Stiell et al recommended x-ray evaluation after an ankle sprain for the following:

1. Patients 55 years and older (not the typical NCAA college basketball athlete)
2. Those that were unable to bear weight for 4 steps both at the time of injury and during evaluation.
3. bone tenderness at the inferior tip or posterior edge of the lateral malleolus or
4. bone tenderness at the inferior tip or posterior edge of the medial malleolus.

For those athletes with a suspected mid-foot fracture, x-ray evaluation were recommended for those that:

1. had pain at the base of the 5th metatarsal, cuboid or navicular.

Exclusion criteria include:

1. injury past 10 days
2. pregnancy
3. patients under the age of 18
4. presence of isolated injuries to the skin.

What does this all mean?

If a college athlete sustains an ankle sprain and is able to walk off the court and does not have bony pain either the medial or lateral malleolus and is void of bony pain at the base of the 5th (or other midfoot bone) then it is highly likely that he/she does not have a fracture.  Conversely, if an athlete sprains their ankle and is unable to bear weight at both the time of injury and at the time of evaluation (once the emotional piece has settled), an x-ray evaluation is warranted due to the very high likelihood of a fracture.

The Ottawa Ankle Rules Modified – Buffalo Rule

“The Buffalo Rule was derived to increase the diagnostic accuracy of the Ottawa Ankle Rules, with the point tenderness criterion directed to the crest or midportion of the malleoli (distal 6 cm of the fibula and tibia), reducing the likelihood of palpating over injured ligament structures.”

Big Cost Savings

“The Ottawa Ankle Rules are reported to result in a 19% to 38 % reduction in radiography costs associated with excluding ankle fractures after sprain injury.”

“The Buffalo Rule is reported to result in a 54% reduction in radiography costs."

“National cost savings estimates with implementation of the Ottawa Ankle Rules range from $18 to $90 million annually (depending on the payor mix involved).”

Conclusion

“Based on the current research, it is recommended that the Ottawa Ankle Rules and, by extension, the Buffalo Rule be included in both athletic training clinical practice and educational programs.  In the present era of cost containment, increased awareness of unnecessary tests and procedures will only become meaningful.  Accordingly, clinicians will need to use the information presented in the systematic review, combined with their own practical experience and the patient’s values, to determine how best to apply the data in an evidence-based manner.”

References

Jenkin M Sitler MR, Kelly JD. Clinical Usefulness of the Ottawa Ankle Rules for Detecting Fractures of the Ankle and Midfoot. J Ath Train. 2010;45(5):480-482.

Leddy JJ, Smolinksi RJ, Lawrence J, Snyder JL, Priore RL. Prospective evaluation of the Ottawa Ankle Rules in a university sports medicine center: with a modification to increase specificity for identifying malleolar fractures. Am J Sports Med. 1998;26(2):158-165.

Leddy JJ, Kesari A, Smolinski RJ. Implementation of the Ottawa Ankle Rules in a university sports medicine center. Med Sci Sports Exerc. 2002;34(1):57-62.

Stiell IG, Greenberg GH, McKnight RD, Nair RC, McDowell I, Worthington JR. A study to develop clinical decision rules for the use of radiography in acute ankle injuries. Ann Emerg Med. 1992;21(4):384-390.

Topics: Art Horne, Health & Wellness

Exertional Rhabdomylysis

Posted by Boston Sports Medicine and Performance Group on Sep 21, 2010 6:25:00 PM

by Art Horne

This past week I blogged about Rhabdo in an effort to raise an awareness between collegiate Sports Medicine and Strength Staffs as we begin to enter basketball pre-season across the country; this after 19 high school Oregon football players were treated for what appears to be Exertional Rhabdomyolysis.

Below is a summary of three articles outlining the cause, treatment (refer) along with some prevention points that should be reviewed by both the basketball athletic trainer and strength coach prior to beginning your fall training programs.

Key Points / Cliff Notes Version (modified from Clarkson)

1. “Exertional Rhabdomyolysis is the degeneration of skeletal muscle caused by excessive, unaccustomed exercise.  Symptoms of rhabdomyolysis include muscle pain, weakness and swelling; myoglobinuira (presence of myoglobin in the urine); and increased levels of muscle enzymes and other muscle constituents in the blood.”

2. Myoglobin in the urine causes your urine to become dark in color similar to cola.  “In rare cases, myoglobin can precipitate in the kidneys and cause renal failure” and ultimately death.

3. Severe episodes tend to occur at the beginning of a training program (think freshmen joining your otherwise veteran team), when exercise is extreme or excessive (boot camp style or circuits with repeated bouts to failure), and when accompanied by heat stress (summer or fall workouts) and dehydration (I would be willing to bet that the majority of our basketball athletes are more often than not, not properly hydrated).  “Insufficient acclimatization, inadequate diet and lack of specific physical conditioning may also contribute to this condition.”

4. “Certain individuals may be predisposed to rhabdomyolysis, possibly due to a latent metabolic disorder.”


What is it?

Rahabdomyolysis is defined as “a degeneration of muscle cells and is charactierized by a group of conditions including muscle pain, tenderness, weakness, and swelling; myoglobinuria (presence of myoglobin in the urine); and increased levels of sarcoplasmic (muscle) proteins and other muscle constituents in the blood.” (Clarkson)

“One of the proteins released from damaged muscle cells is myoglobin.  High levels of myoglobin in the blood (myoglobinemia) result in a “spill over” of myoglobin into the urine (myoglobinuria).  In certain situations, myoglobin can precipitate in the kidneys and cause renal failure.” (Clarkson)

“Equally dangerous can be the leakage of potassium into the bloodstream, which under certain circumstances can interfere with propagation of the heartbeat.  Another danger is posed by the possible leakage of excessive calcium into the cell, creating a state of hypocalcemia in the bloodstream, which can lead to irregular heartbeat, muscle spasms, and other symptoms.” (Claps)

Signs and Symptoms

• Symptoms of Rhabdo include: persistent muscle pain and weakness, swelling and dark urine (tea or cola colored).  
• These symptoms at first may present similarly as a case of delayed-onset muscle soreness (DOMS), however,  change in urine color and severe muscle pain often set this condition apart and should be taken very seriously.

Prevention

• During the first few days of training camp or return to school (either summer training or fall classes) never begin your program with repetitive, excessive exercise.  Strenuous activities, circuits or “mental toughness” training should only be conducted with well-conditioned athletes.
• If ambient temperature is hot, be sure to have your athletes drink plenty of water or provide additional water breaks during the training. 
• Athletes should never try to manipulate their diet suddenly heading into camp or pre-season training in an effort to lose weight or reach a goal weight set by coaches.  Any manipulation in diet should be monitored with lower intensity exercise first to make sure the athlete responds well before exposing them to strenuous exercise.
• If your athlete reports dark urine a day or two after an exercise session report them to your team physician or sports medicine staff immediately.
• If your athlete reports feeling dizzy during an exercise session, especially those in warmer weather, have them stop and rest immediately. 
• Know your athletes. Get complete medical histories of each basketball athlete you work with and discuss with your athletic trainer/strength coach who may be at risk after evaluating their baseline assessment/testing prior to beginning strenuous exercises.
• Progress training slowly.  Back off training if DOMS seems severe – don’t automatically assume your athlete  didn’t train during the summer, or are wimps.

Take Home Message

Specificity of training is important.  Just because your athlete has been playing pick-up ball all summer doesn’t mean that they are ready to endure a circuit of max dips followed by max  push-ups finishing with max tricep extensions.  Summer pick-up does not provide “protection” against this type of exercising.  Ease into max effort drills slowly. 

Ego Trip. In a world where toughness matters and quitting an exercise before your team finishes simply is not an option, some individuals will go well beyond a tolerable level of muscle injury in an effort to impress their coaches and teammates.  Start freshmen or lower trained athletes with lower weights than their older counterparts when doing circuits until a reasonable amount of adaptation and fitness has occurred.

An Ounce of Prevention.  Most reported military cases of “heat stress, rhabdomyolysis and acute renal failure have occurred during the first few days of training during which excessive repetitive exercises (e.g., push-ups, squat jumps) have been used.   In the college setting, repetitive, strenuous exercises should be limited or avoided until a base level of fitness can be established.

“Most cases of rhabdomyolysis do not require hospitalization, and individuals recover within one week.  However, in certain individuals, rhabdomyolysis can be severe.  The combination of heat stress (hyperthermia) and rhabdomyolysis can produce acute renal failure, which in rare instances can result in death.” (Clarkson)


References

Brudvig, T. and P. Fitzgerald, 2007. Identification of Signs and Symptoms of Acute Exertional Rhabdomyolysis in Athletes: A Guide for the Practitioner. Strength and Conditioning Journal. Vol 29, 10-14.
Clarkson. P. 1993. Exertional Rhabdomyolysis and Acute Renal Failure.  Physiology. Vol 15, Number 3, 1993.
Clap, F. 2005. Exertional Rhabdomyolysis. Strength and Conditioning Journal. Vol 27, Number 3, 73-74.

Topics: Art Horne, Health & Wellness

Injury Prevention: Psychology and Intervention

Posted by Boston Sports Medicine and Performance Group on Sep 21, 2010 6:23:00 PM

A review by Art Horne

Some kids just always seem to get hurt, year after year they show up in your athletic training room like clockwork, even for injuries sustained outside of their sport.  How many times can the same athlete get hit by a car while riding their bike on campus? Or what about the other athlete that just seems to always be in for a new injury evaluation every Monday whether they had a game on the weekend or not.  But is it just bad luck, or does their psychological profile lend them to behaviors that clearly puts them in harm’s way at a much greater rate than their teammates?

The following serves as a brief review from Urban Johnson’s article, Sport Injury, Psychology and Intervention: An overview of empirical findings, from the Centre for Research in Sport and Health, Halmstad University.

From this article, Johnson reviews psychosocial antecedents to sport injury, “the most influential stress-injury model aimed at predicting the occurrence of sport injury was developed by Andersen and Williams, 1988, and modified by Williams and Andersen, 1998.  It posits that individuals with personality characteristics that tend to exacerbate the stress response, with a history of many stressors, and with few coping resources will be more likely, when placed in a stressful situation, to appraise the situation as stressful and thus exhibit greater physiological activation and attentional disruption.  The muscle tension, distractibility, and perceptual narrowing that occur during the stress response appear to be the mechanisms behind increased injury risk (Andersen & Williams, 1999)”

Risk Factors

Personality: “relationships are often found between injury outcome and risk factors such as internal or external locus of control, competitive trait anxiety, low self-esteem and low mood state early in the season.”

History of Stressors: “the vast majority of these studies have found a positive relationship between injury and high life stress, daily hassles, and life changes.  These findings suggest that preoccupation with life change may affect concentration on training and competition and increase the likelihood of injury.”

Coping Resources:  Several studies, “report a relationship between athletes low in coping resources and prediction of injury. Hanson et al (1992) found the coping resources were the best discriminator of both severity and number of injuries.”   Some other studies, “have shown a direct effect, with athletes low in social support exhibiting more injuries”, while other studies, “have found a relationship between negative life events and injury outcome only for athletes low in both social support and coping skills.”

Intervention Studies

Although there is some research to suggest that relaxation techniques, counseling, imagery, and team building are affecting in limiting the number of reported injuries “the implementation and assessment of controlled intervention that might lessen the stress response and reduce injury vulnerability is sparsely documented.”

Where do we go from here? Implications for practice

  1. Major Life Stressors: “major life event stress and daily hassles seem to have a direct or indirect effect on injury resiliency and vulnerability.” So where do we go from here? In a recent article I posted the “Mood Questionnaire” that we use prior to training and/or practice.  This gives me at least some talking points if an athlete scores low under, “Joy of Competition & Training”, “Focus” or “Sharpness” and allows me to pull that athlete aside and have an additional conversation and follow up as needed.  “Because of their close relationships with athletes, coaches and therapists are in a unique position to recognize athletes at-risk and help them. They are in a position to teach athletes how to expand their range of coping skills and thus to meet troublesome life events and daily hassles.”


  1. Recognize Effect of Personality Variables on Injury Outcome:  “People with high competitive trait anxiety, an external locus of control, pessimistic lifestyles, chronically low moods, and aggressive behavior seem to be at greatest risk of injury.”   With this said, Johnson suggests and we have simply added a “psychosocial risk assessment” as part of our general screening examination at the beginning of the season.  This can be as simple as:


ANXIETY SCORE:  Please rate yourself.

Prior to competition, how would you rate your anxiety level?  10 being the highest, and 0 being the lowest. ­­­____


  1. Prevention Techniques and Skills: “Relaxation techniques, including somatic relaxation techniques focusing on breathing and/or progressive muscle relaxation show promise. So does the practice of having athletes keep daily or weekly notes during the season.” Again, by tracking athletes at least once a week with a simple mood score/questionnaire, you are able to see trends develop with noticeable spikes in mood or fatigue becoming talking points for all of those involved including the sports medicine and strength & conditioning.  “Coaches and sport psychologists should consider implementing intervention programmes for athletes with a high injury-risk profile.”

Topics: Art Horne, Health & Wellness