by Art Horne
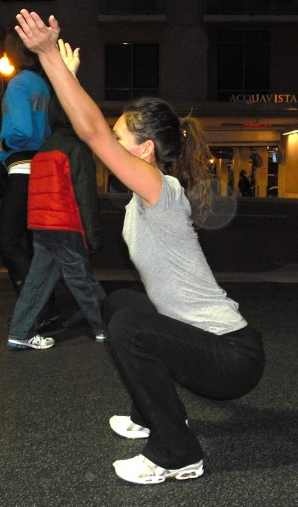
Since squatting and the decision to squat or not comes up more often than any other subject when it comes to sports medicine and performance professionals, we decided to tackle this subject head on in this latest post. Everyone should be able to squat - there I said it. So whether you'll be teaching it after surgery, or training it in the weight room it's important that the beliefs and concepts that you have pertaining to the squat is the same as those that you work with in order to achieve the highest level of athlete success.
Below is an outline which we have used in a staff journal club to finalize our teaching progressions and teaching cues for the squat pattern while also getting everyone on the same page and on board with the importance of squatting.
Squat Goal: all athletes should be constantly working towards a score of three on their OH Squat test. Whether they initially present to Sports Medicine with back, knee, hip or other LE injury or pain, all care and performance training providers should be able to look at this movement pattern and address any movement concerns IN ADDITION to their traditional rehab or performance program regardless of initial pain or injury presentation.
FMS Squat Test: see functionalmovement.com for complete details
(Have a staff member certified or familiar with the FMS review testing criteria, followed by staff members from both staff’s testing and evaluating each other).
What if the student-athlete describes PAIN during the squat test?
Only qualified medical professionals should deal with pain and painful movement patterns. If a student-athlete experiences pain they should be referred to the athletic trainer coordinating their care at the college level or another health care professional if you are working in the private sector. Although many “painful” maneuvers are often neglected and played down by the student-athlete, seldom do those with pain during a simple bodyweight squat ever go on to compete at a high level without future injury and time loss.
Since PAIN is complicated, multifactorial and often unpredictable, a painful pattern should be “broken down” to its component parts so to find the underlying pain generator or limiting factor. The Selective Functional Movement Assessment TM offers health care providers a systematic approach and a common movement language among all staff members.
(Have a staff member certified or familiar with the SFMA squat breakout present this algorithm to the remainder of your staff and then follow up by having individuals from both groups evaluate each other while identifying the limiting factor within each individual’s squat pattern.
SFMA Squat Breakout:
1. Overhead deep squatting pattern
2. Fingers interlocked behind neck into deep squat position
a. This position lowers the difficulty by not having the shoulders flexed vertical
b. Removes the upper body components and reduces the level of dynamic stability needed to perform the squat.
3. Assisted Squat from ATC into deep squat
a. Athlete holds hands of evaluator while performing squat.
b. Looks at the true symmetrical mobility of the lower body (hips, knees, ankles) without the requirement of dynamic stability.
4. Half kneeling Dorsi-flexion (test for ankle ROM)
a. Place foot on weight bench and lean forward over the foot as far as possible without the heel coming off the bench.
b. The knee should move forward out past the toes at around 4 inches.
c. Repeat for both sides.
5. Supine Knees-to-chest – test for anatomical limitations at hip in non-weight bearing position.
a. Looks at mobility of the hips, knees and spine in a non-weight bearing position.
b. Can help differentiate a mobility vs. stability problem
c. Have the patient grab both shins and attempt to touch their thighs to their lower rib cage.
d. If they can’t get their calves to touch their thighs due to knee tightness, have them grab their thigh instead and repeat thin maneuver. (This will help differentiate between hip and knee mobility issues. If in this position they still can’t get their thighs to touch their rib cage, then there is a potential hip dysfunction).
What’s Next?
Since so many of us sit on our butts all day it’s no surprise that our butts are rarely working to the level they should be.
(Unless of course you use your butt for a simple paper weight – then your butt works just fine).
Because the squat is the end goal for all athletes in terms of both health and performance, it’s important for athletic trainers and other health care professionals to begin grooving this pattern early on in the rehabilitation process so that there is not only a seamless transition from one Sports Medicine to Performance Training, but also a clear message when it comes to cueing and technique among all professionals on staff. In order to have everyone speaking the same squat language, starting everyone back on the ground and building a solid and logical progression from post-surgical all the way to high performance only makes sense while the entire staff is playing nice together.
Below is a starting point with a few teaching cues to get the conversation started and a solid progression built between the two groups. (I have purposefully not included a complete progression below so to force the issue with your own staff. People tend to complete tasks fully if they have had an opportunity to contribute to so be sure to ask for feedback from both staffs – Sports Medicine and Strength & Conditioning).
Back to Basics: (Supine Table Series)
1. Teach Glute Max w/ Bridge
2. Supine Bridge w/ Thera-band
3. Supine Bridge w/ Marching
4. Single Leg Hip Bridge
Teaching Points:
a. Squeeze Glutes to hold “gold coin” between butt cheeks or pretend to “crack a walnut” while bridging
b. brace core musculature as taught by Stu McGill
c. Ensure hamstrings are not dominate during exercise by palpating medial tendons.
d. Add a theraband around knees or create an ADDuction force to the knees to facilitate additional glute max contraction
– NEVER PLACE A BALL BETWEEN THE KNEES!
Teaching Progression for the Troubled Squat
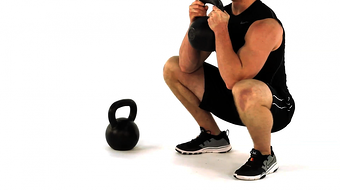
1. Goblet Squat: hold Kettlebell by the horns and squat to depth (providing a weight to the anterior portion of body balances the athlete and gives an additional point of stability
2. Descend squat so that elbows touch VMO of each knee.
3. If depth is a problem “wedge” elbows inside of knees to mobilize the hips.
4. In the early stages be sure to stand behind your athlete to ensure safety – encourage thoracic extension and a flat back
5. ** use clinical judgment based on patient presentation and injury. If unsure, REGRESS activity and PERFECT – OWN THE MOVEMENT before progressing to more advanced alternatives.
READ: Squatting - An Expression Of Health
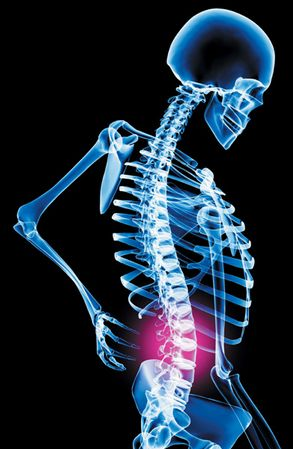
Next week: Bringing both staffs together to learn and master the hip hinge – a must for avoiding and rehabilitating back pain and also pulling big deadlift numbers!